ตัวอย่างโครงงาน Arduino UNO สั่งการไฟกระพริบ LED พร้อมกับส่ง ข้อความ สถานะของหลอดไฟ และ ส่งข้อความ ผ่าน LCD
Arduino IDE
Date 07 20, 2023สวัสดีครับ จากตัวอย่างโค้ดที่ผ่านมาถ้าผมต้องการให้ led กระพริม โดยจะมี การแสดงค่าสถานะ delay time ของหลอดไฟ led ที่ติด แสดงค่าผ่าน LCD เพื่อแสดงค่า โดย โดยอ้างอิงจาก โครงการก่อนหน้า โดยจะรับตัวเลข 0-9 ผ่านทาง serail port เพื่อนำมา คูณ 100 เพื่อใช้ เป็นค่า daley time เพื่อใช้ในการกำหนดสถานะไฟกระพริบให้กับไฟ LED
- Bord Arduino Uno
- หลอด led
- R330 ohm
- LCD 16x 2
- I2C
- computer

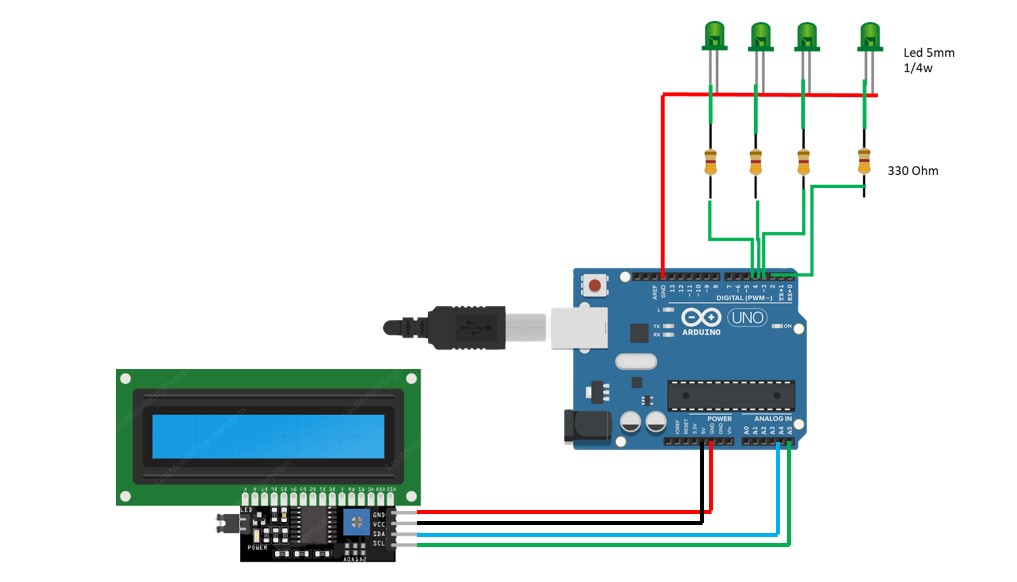
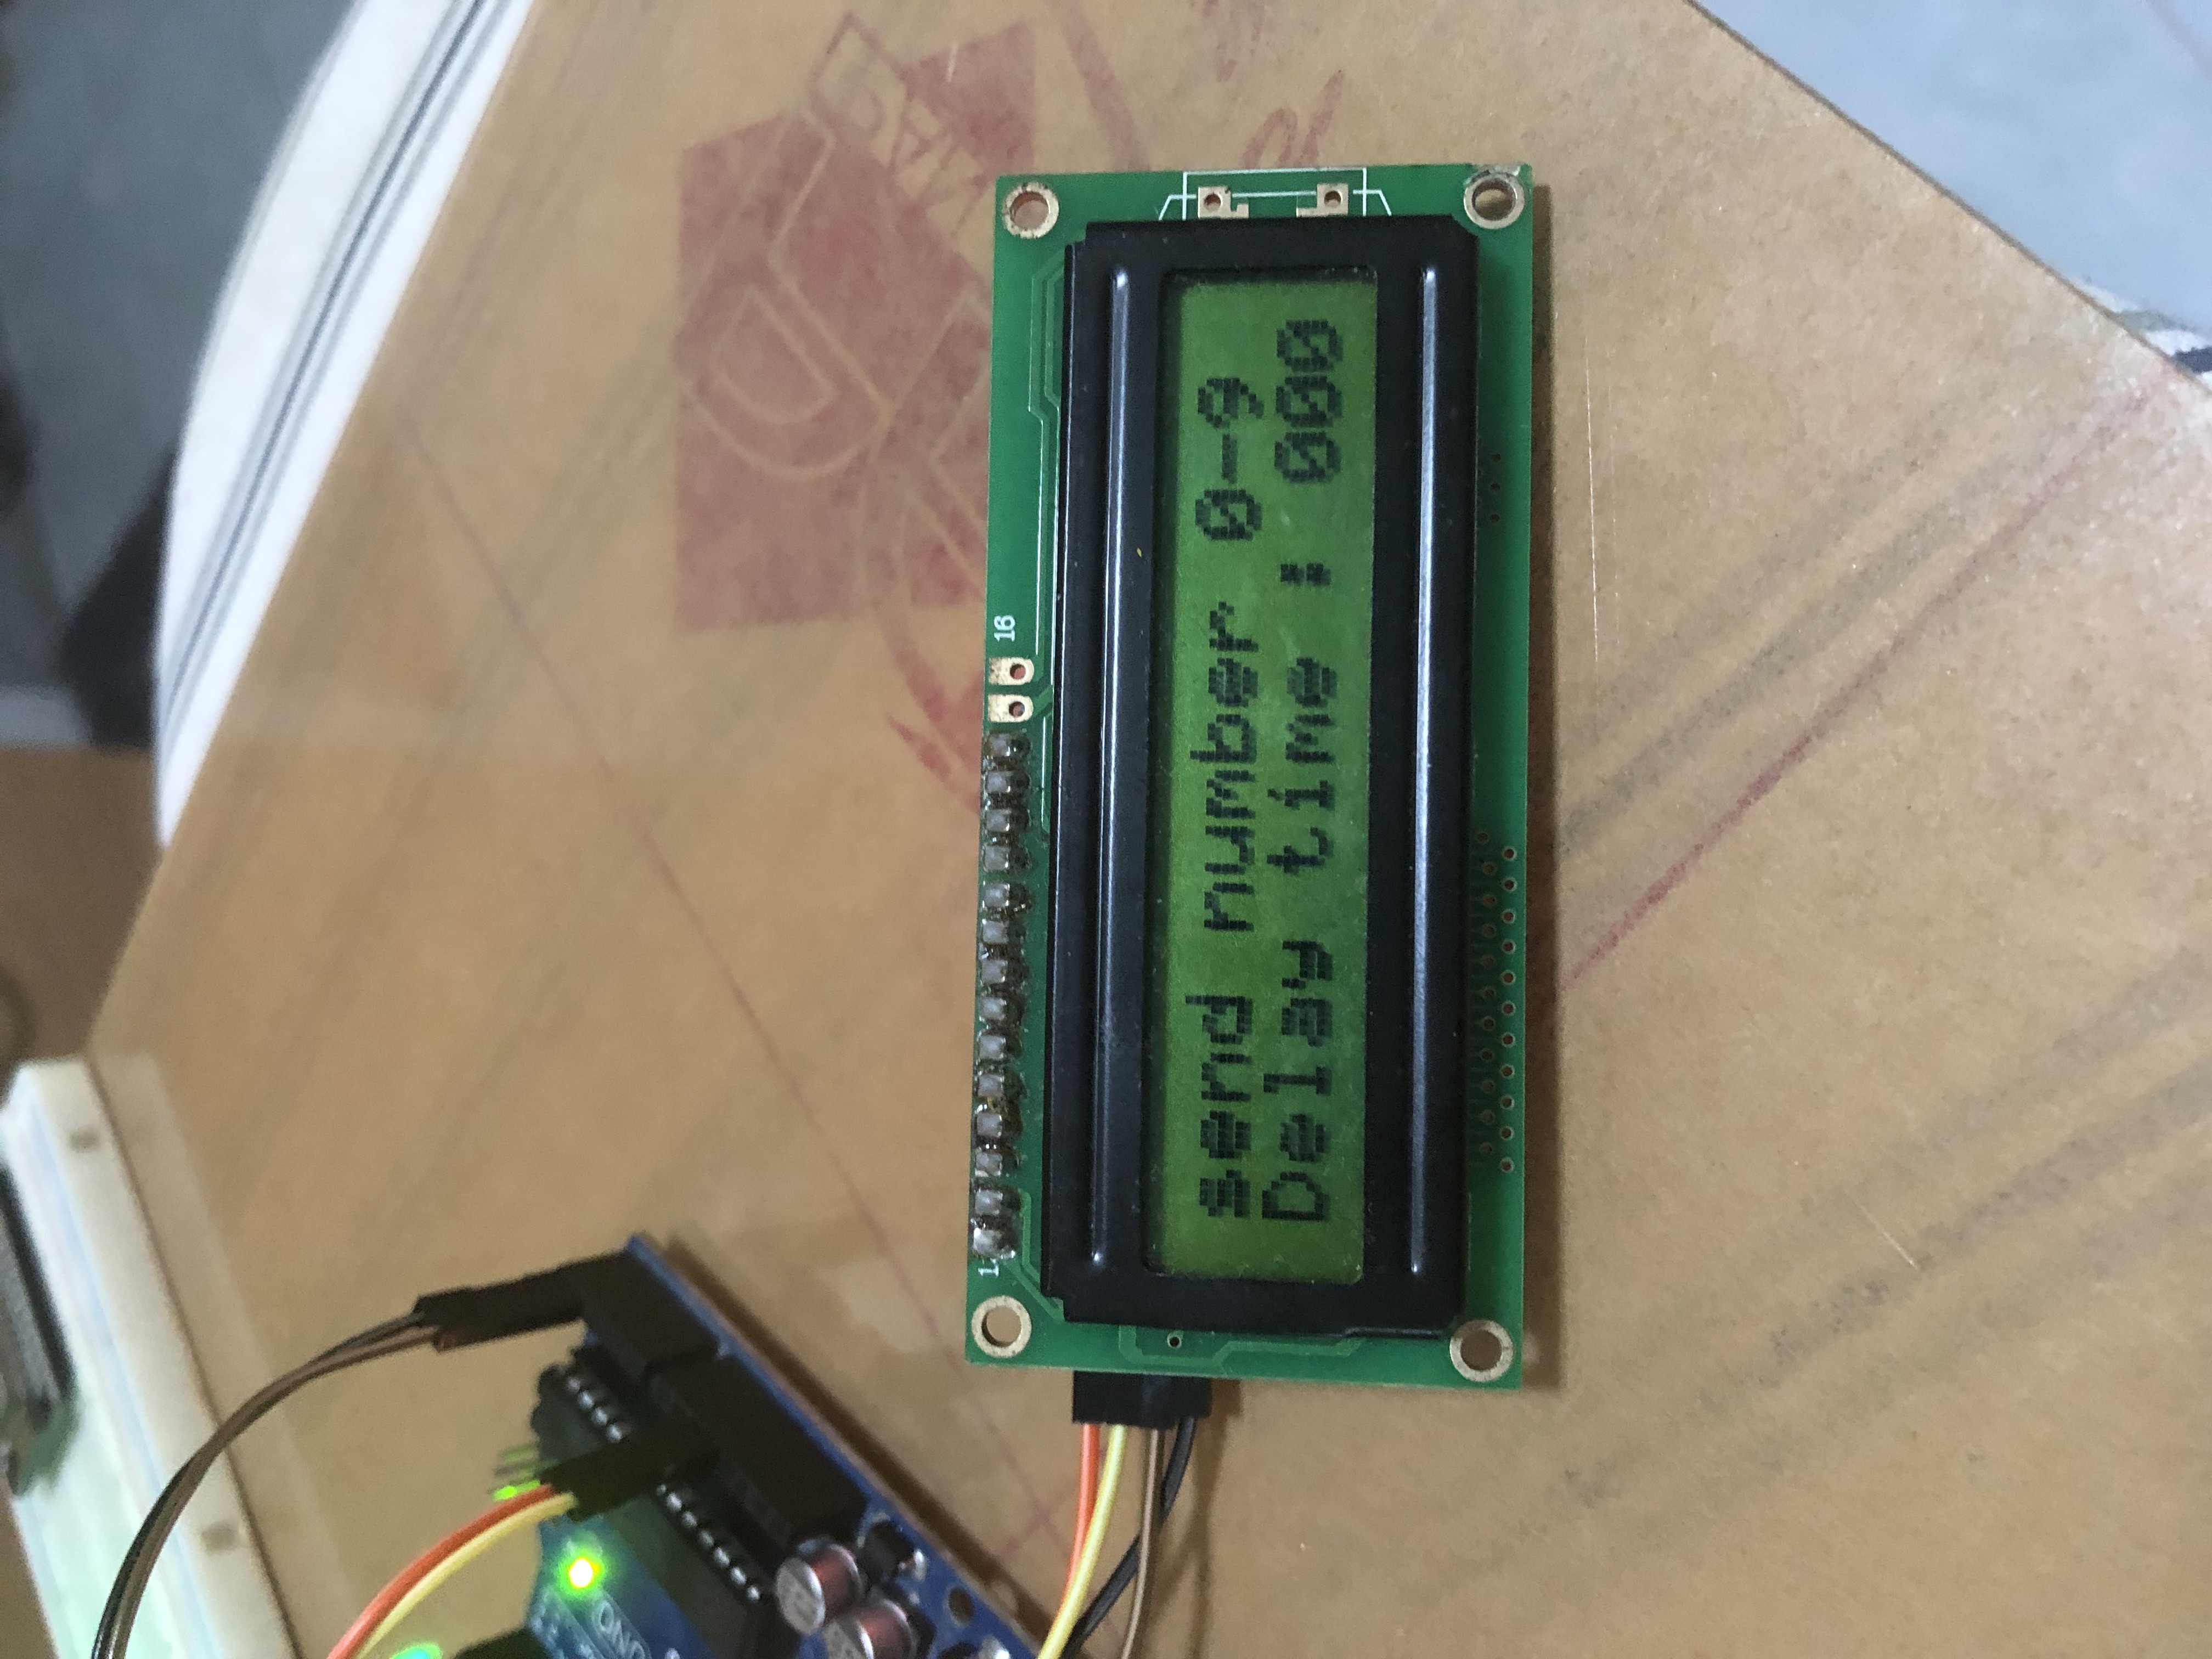
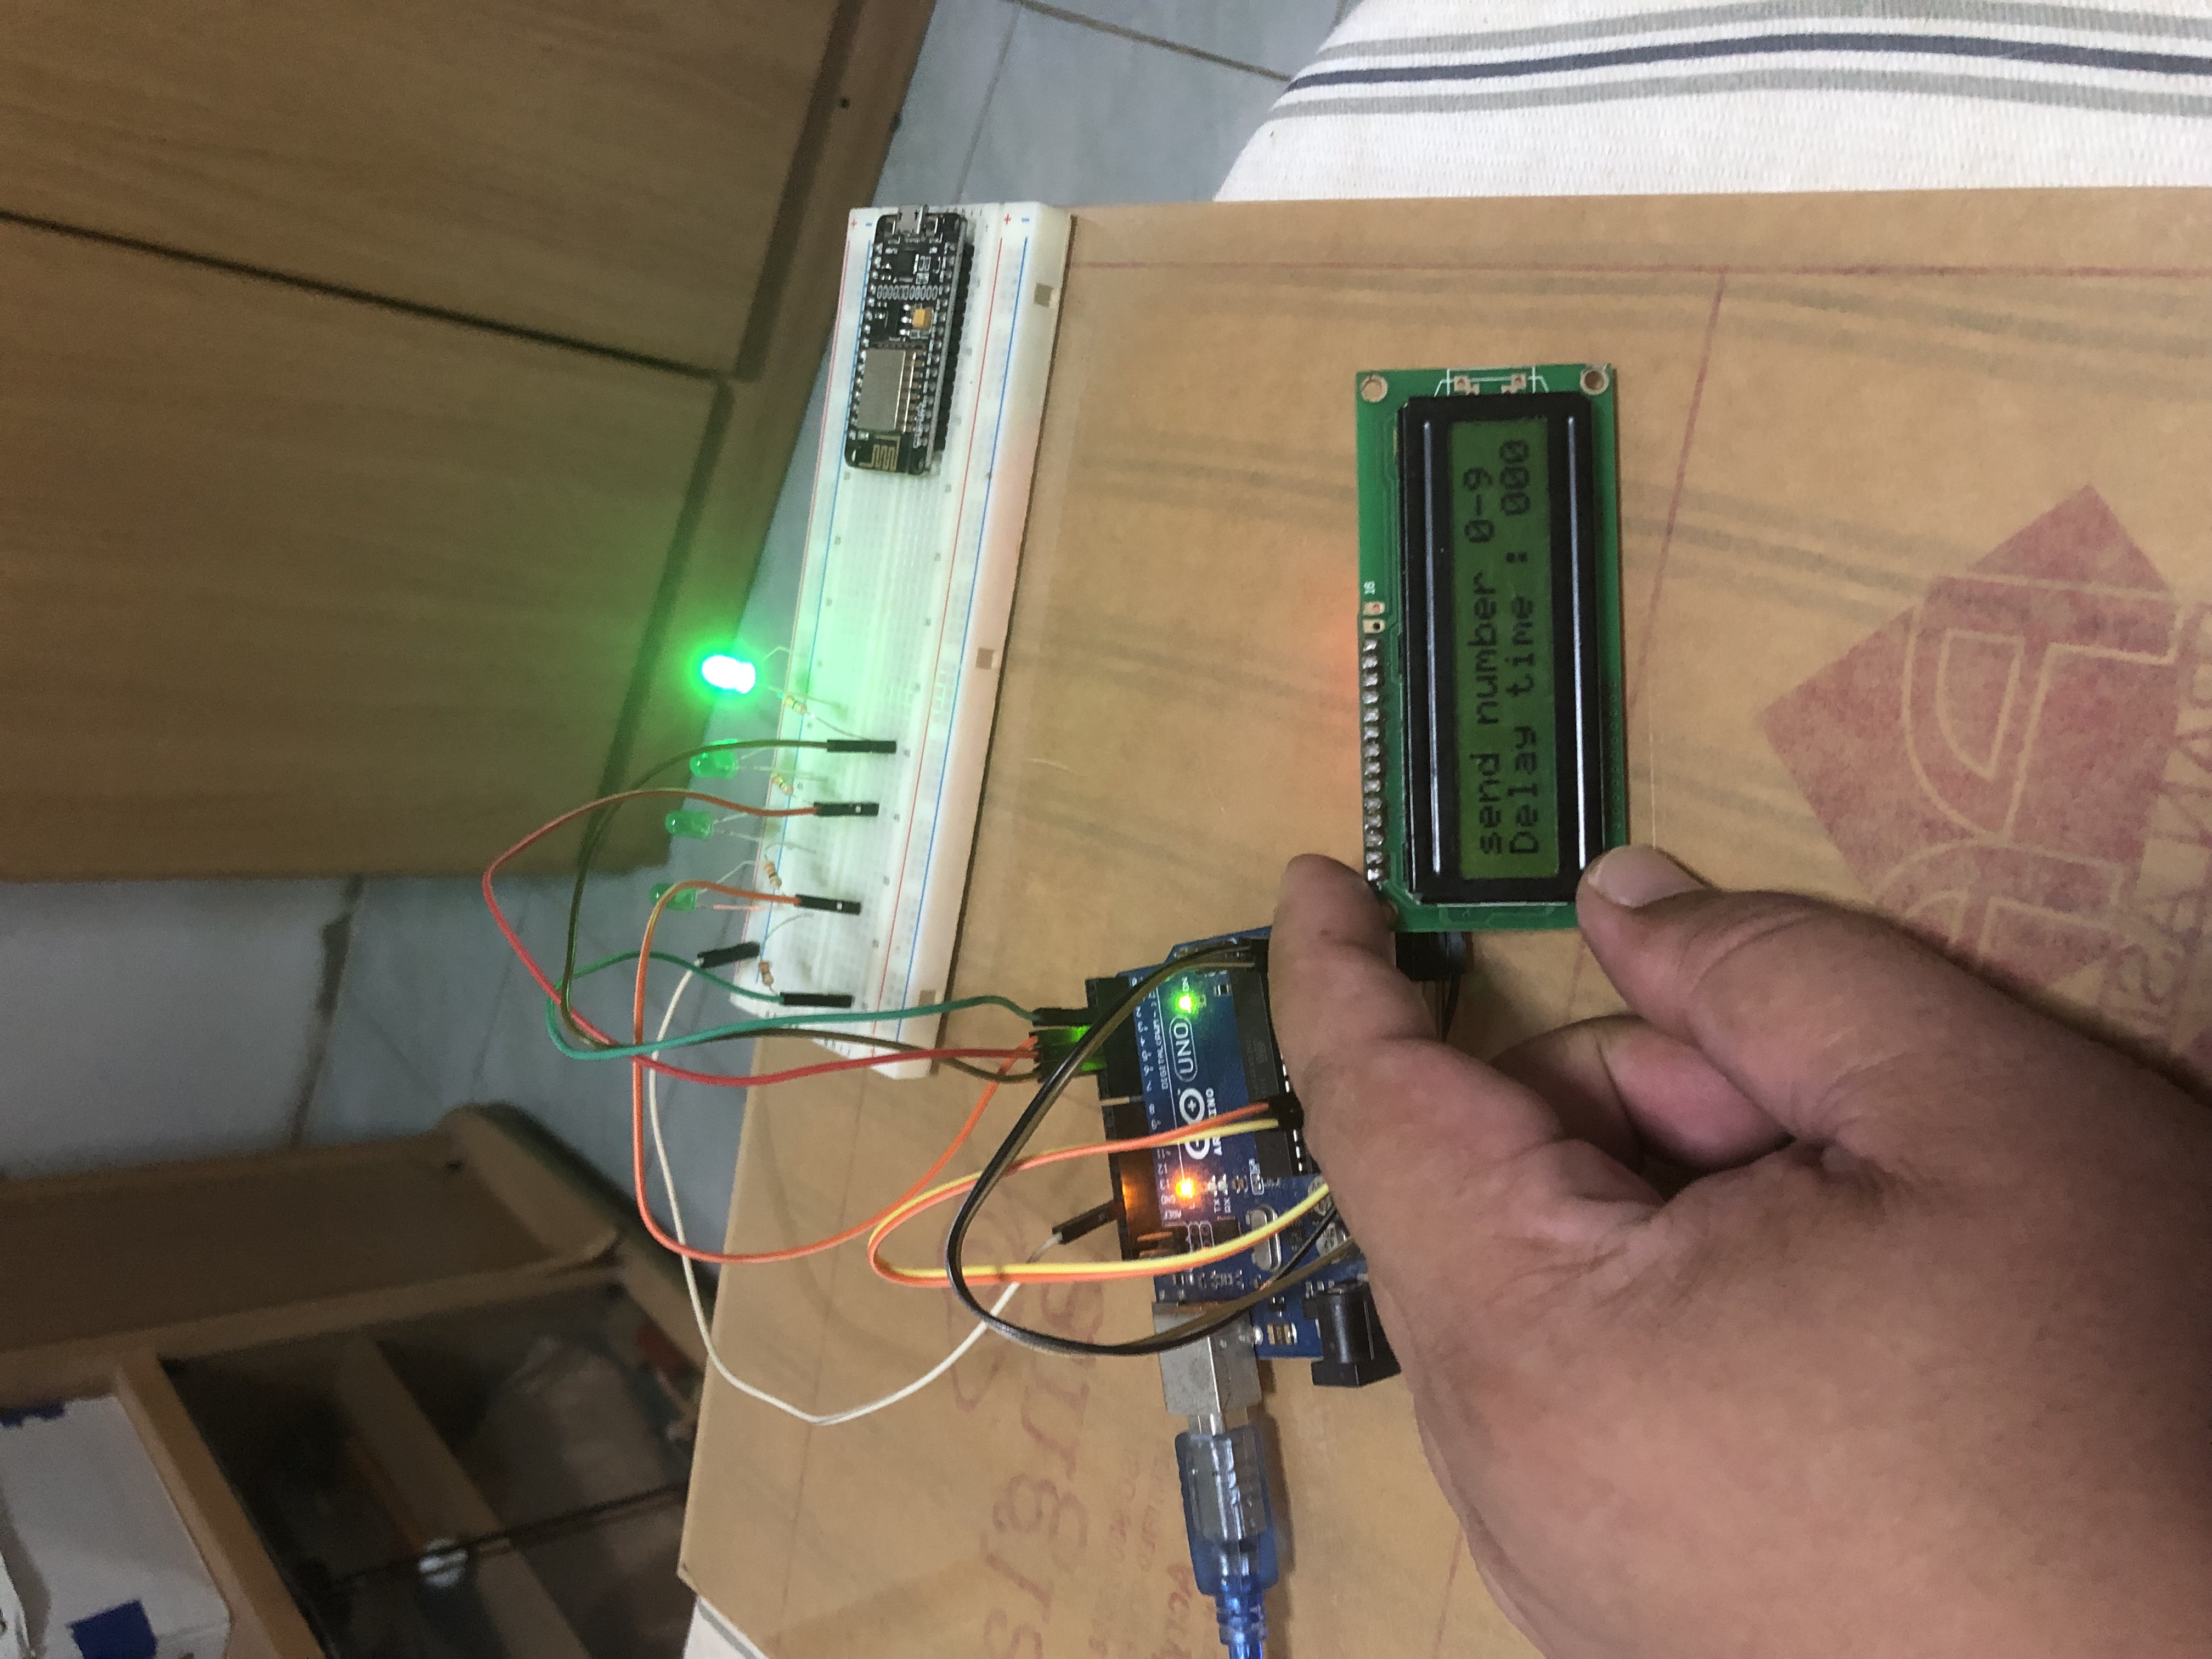
สิ่งที่ต้องทำก่อนที่จะเริ่มลงมือ wiring หรือต่อสานไฟตามรูปภาพ และเชื่อต่อ arduino กับ คอมพิวเตอร์ด้วย port usb เขียนโปรแกรมโดย ตัวโปรแกรม ทำการ config pin 2-5 เป็น output เพื่อส่งค่า 1 ออกไป ในรูปของ digital output 1 or 0 แล้ว เขียนคำสั่งเพื่อ loop โดยให้ pin 5 เปิดและปิดพร้อมกันโดยมี delay time รับค่าจาก serial port เพื่อ ส่งข้อมูลแสดงสถานะ daley timeของไฟ led และ แสดงข้้อความที่รับ ผ่าน serial monitor และ lcd
โค้ด Arduino
/*
 * SerialReceive
 * Blink the LED at a rate proportional to the received digit value show LCD
 */
 #include
 #include
 LiquidCrystal_I2C lcd(0x3F, 16, 2);
 const int ledPin =5;
 int blinkRate=0;

void setup()
{
  Serial.begin(9600);
  pinMode(ledPin,OUTPUT);
  Serial.println("please send the number 0-9 ");
  lcd.init();
  lcd.setCursor(0,0);
  lcd.print("send number 0-9");
}
void loop()
{
  if ( Serial.available())
  {
    char ch=Serial.read();
    if(ch>='0' && ch<='9')
    {
      blinkRate = (ch - '0'); // ASCII value converted to numeric value
      blinkRate = blinkRate * 100;
      Serial.print("Delay time :  ");
      Serial.print(blinkRate);
      Serial.println(" Milisec");
      lcd.setCursor(0,1);
      lcd.print("Delay time :");
      lcd.setCursor(13,1);
      lcd.print(blinkRate);
    }
  }
  blink();
}
void blink()
{
  digitalWrite(ledPin,HIGH);
  delay(blinkRate);
  digitalWrite(ledPin,LOW);
  delay(blinkRate);
}
ผลลัพธ์ led

