ตัวอย่างโครงงาน เรื่อง การเขียน C# เพื่อ ติอต่อ Arduino UNO เพื่อ เปิดปิด LED
Arduino IDE,Visual studio
Date 06 17, 2023สวัสดีครับ บทความนี้จะเป็นตัวอย่างโครงงาน การเขียนโปรแกรมเพื่อการสั่งงาน Arduino ด้วย C#ซึ่งผมเองยกตัวอย่าง มาจากอินเตอร์เน็ต ซึ่งเราสามารถหาตัวอย่างโครางงาASCII นเพื่อนำมาประยุคต์ใช้ได้จาก Google ครับผม ซึ่งตัวอย่างที่ผมยกมาจะเป็นตัวอย่างง่ายๆซึ่งจะใช้ช่องทางติดต่อผ่าน series port RS232 จากคอมพิวเตอร์ไปที่ arduino bord เพื่อทำการเปิดปิด หลอด LED โดยใช้ Visul basic C# ทำ GUI (Grafhic user interface) หลักการทำงานของการติดต่อนี้ จะเป็นการติดต่อด้วย ASCII(American Standard Code for Information Interchange) เป็นการส่งข้อมูลเป็นแบบสัญญาลักษณ์ เป้นคำสั่งผ่าน serial port ระหว่า GUI กับ arduino เพื่อสั่งงานและแสดงสถานะโต้ตอบ ส่วนรายละเอียดผมเองก็ยังไม่เข้าใจลึกซึ้งนะครับเดี๋ยวถ้าเข้าจะเขียนอธิยายให้ฟัง เอาละมาเริ่มกันขั้นแรกเราเตรียมอุปกรณ์กันก่อนเนอะ
- Bord Arduino Uno
- หลอด led
- R330 Ohm
- computer
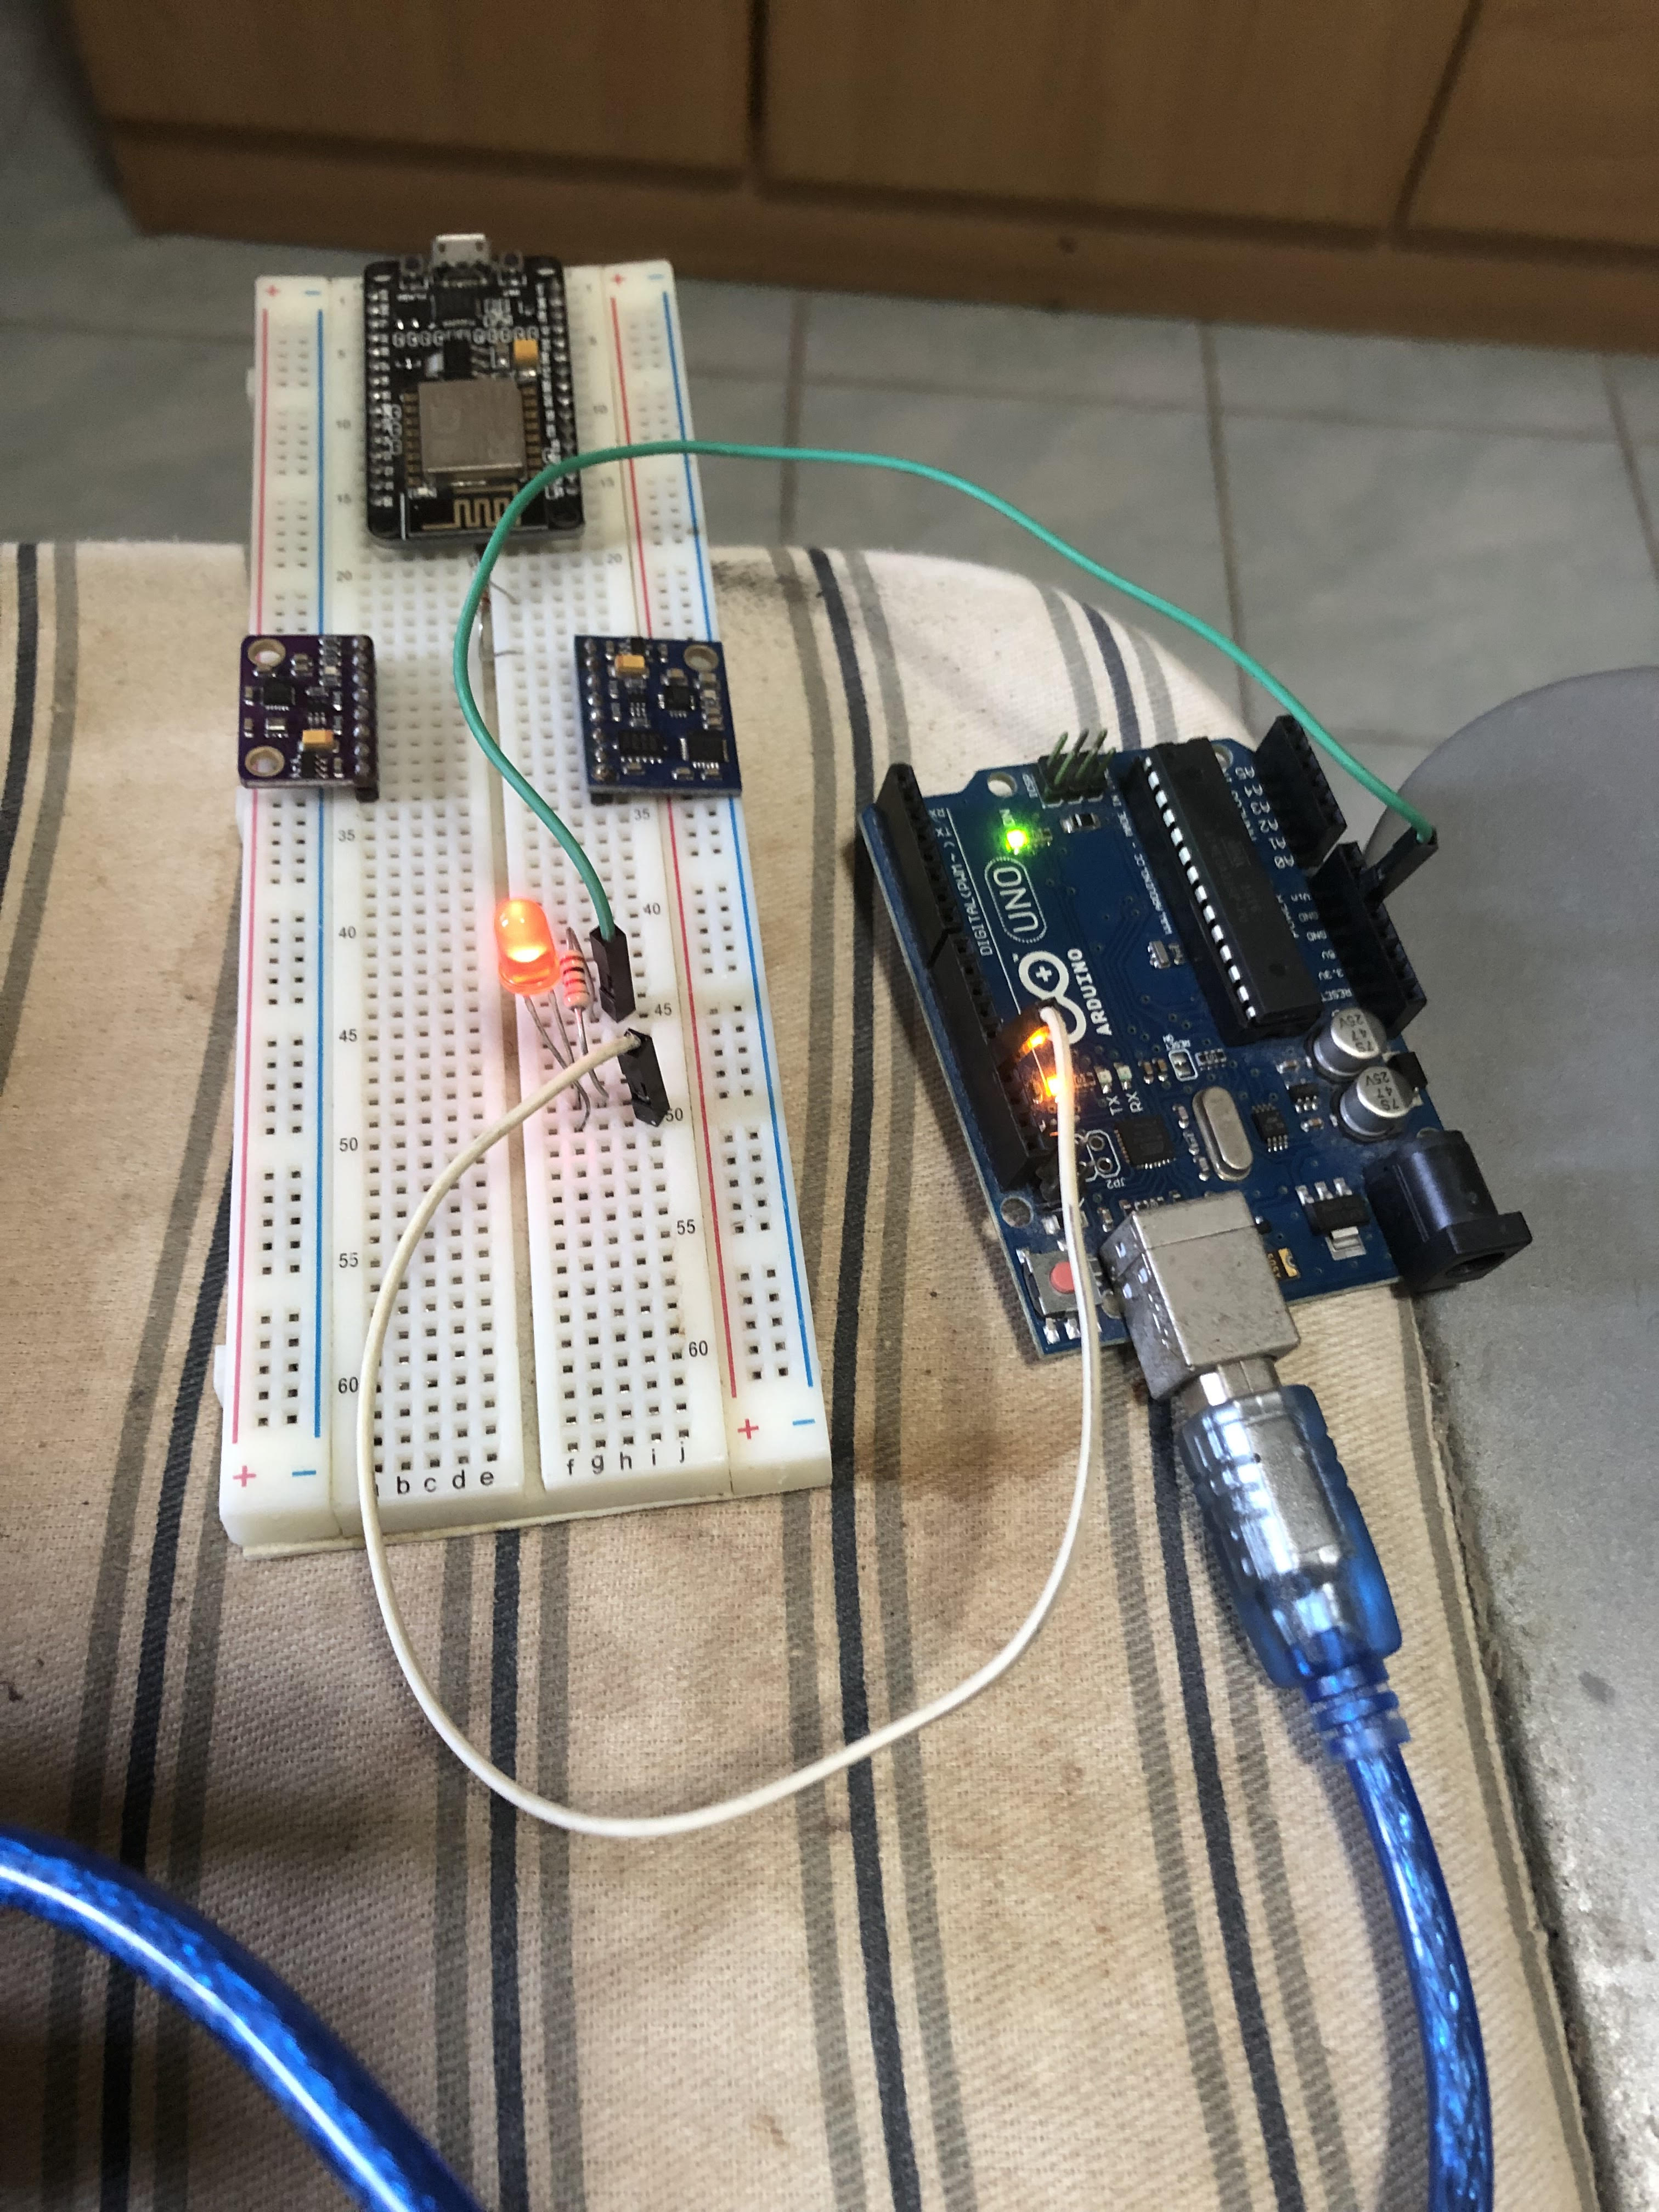
สิ่งที่ต้องทำก่อนที่จะเริ่มลงมือคือการวาง process sequent ของการติดต่อกันระหว่าง บอล์ด Arduino Uno กับ C# GUI Computer ซึ่งจากตัวอย่างที่ทำจะเป็นการส่ง รหัส ASCII เพื่อเปิดปืด หลอดไฟ LED ซึ่งเราต้องทำการเขียน Program คำสั่งสำหรับ Bord Arduino และ C# GUI Computer สำหรับ Bord Arduino จะต้องเขียนคำสั่งรับ รหัส ASCII จาก serial port เพื่อสั่งให้ LED 13 ไฟติด
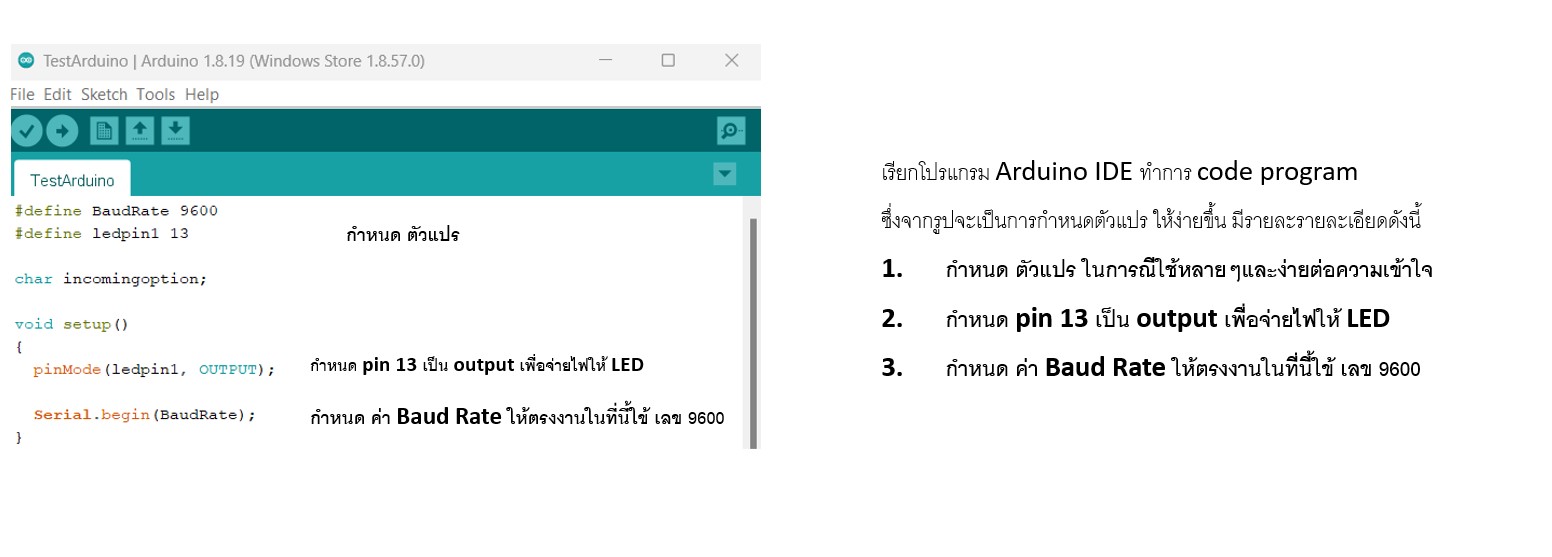
รูป อธิบายโค้ด
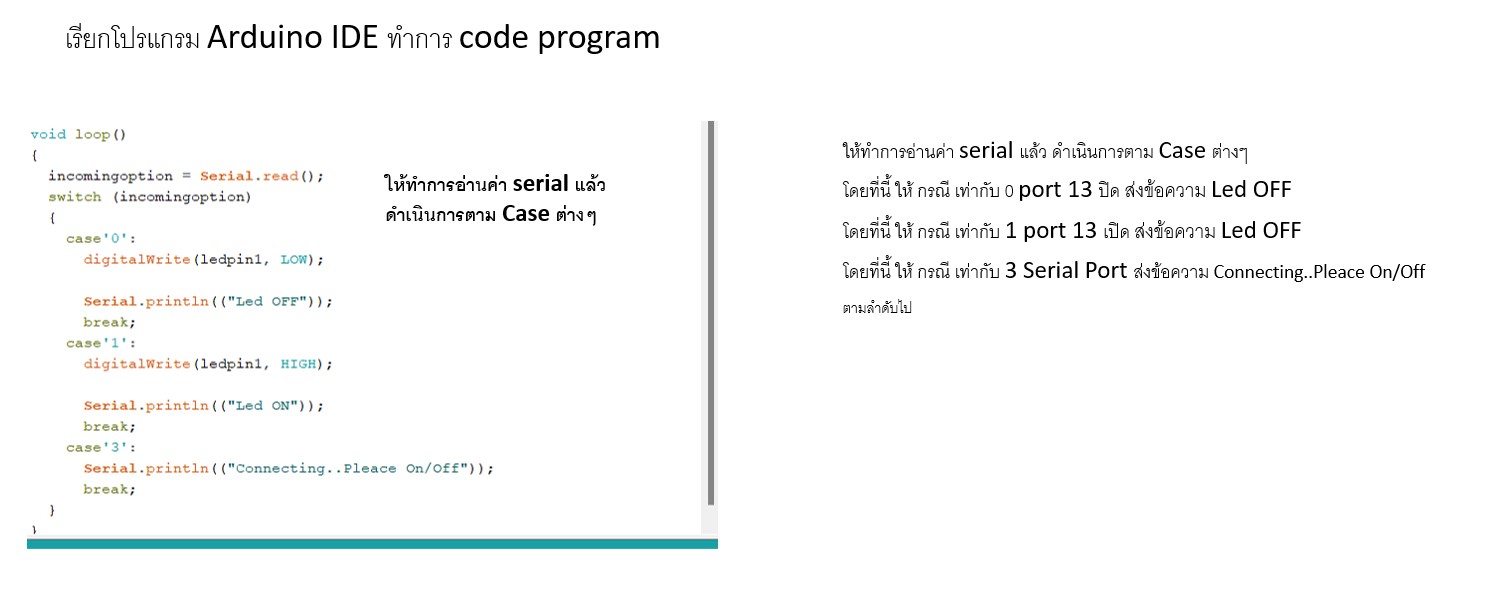
รูป อธิบายโค้ด
โค้ด Arduino
#define BaudRate 9600
#define ledpin1 13

char incomingoption;

void setup()
{
  pinMode(ledpin1, OUTPUT);

  Serial.begin(BaudRate);
}
void loop()
{
  incomingoption = Serial.read();
  switch (incomingoption)
  {
    case'0':
      digitalWrite(ledpin1, LOW);

      Serial.println(("Led OFF"));
      break;
    case'1':
      digitalWrite(ledpin1, HIGH);

      Serial.println(("Led ON"));
      break;
    case'3':
      Serial.println(("Connecting..Pleace On/Off"));
      break;
  }
}
**Code LED ที่ Port 13
Code Visual C#
เลือก NewProject แล้วเลือก WindowsFormsApp สร้าง from GUI ตามรูป
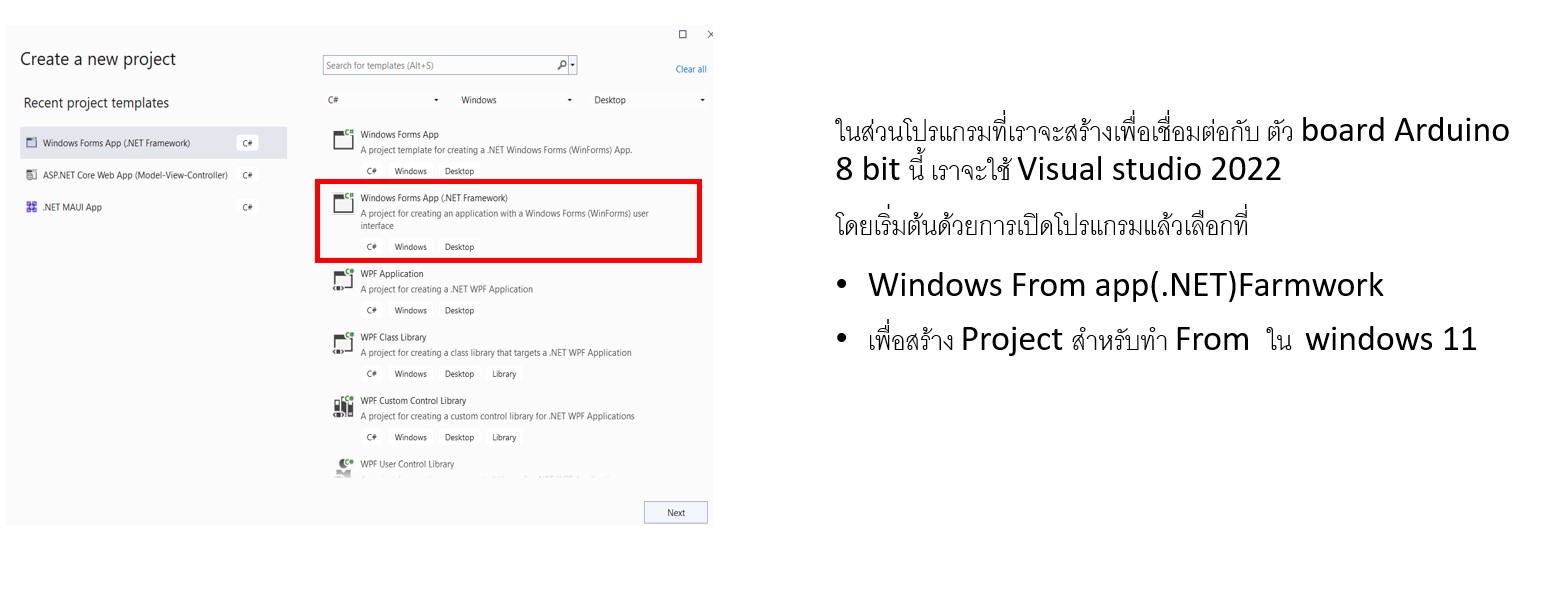
ทำการเปิด program แล้ว สร้างฟอร์ม ตามรูป
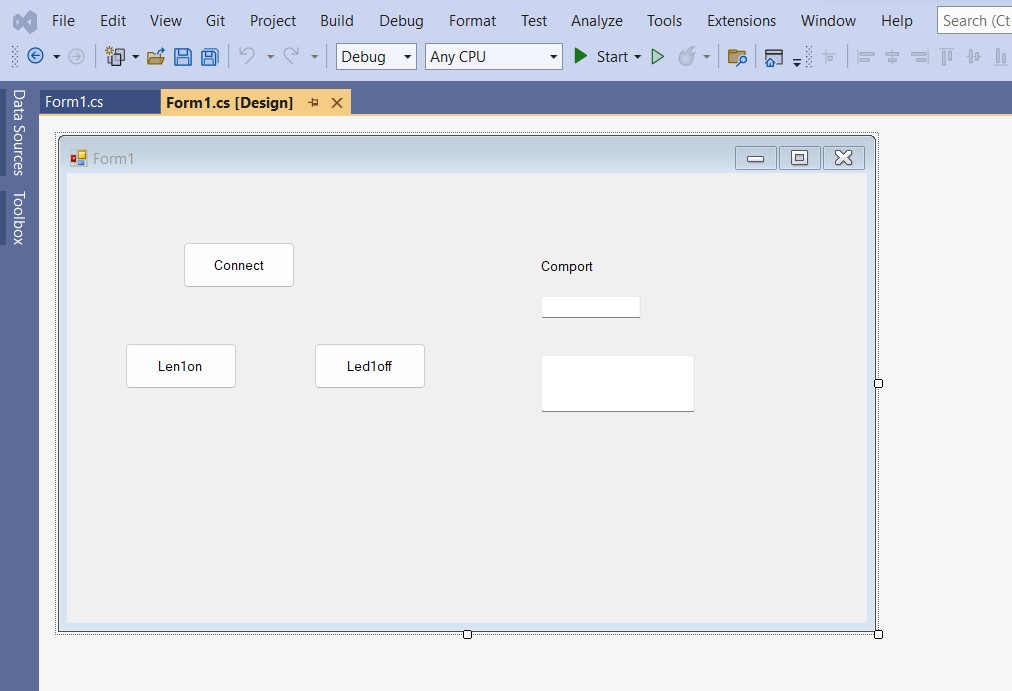
สร้างฟอร์ม ตามรูป
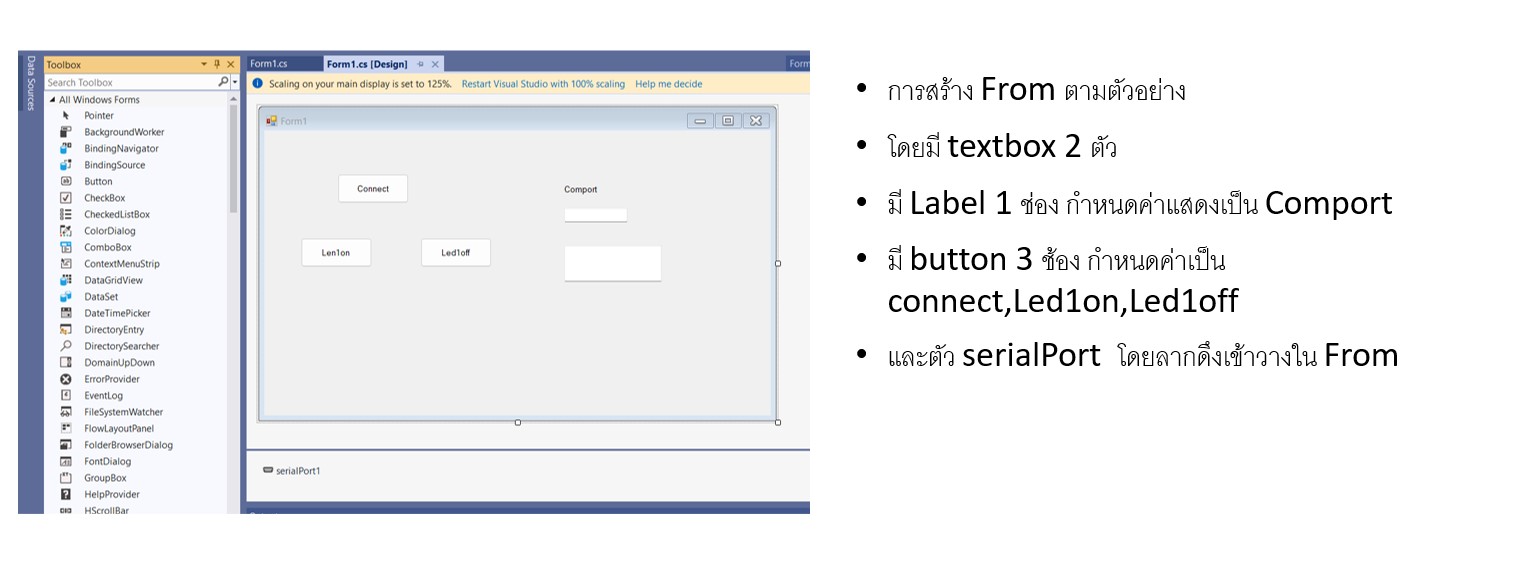
กำหนดค่าตาม รุป
กำหนดค่าตาม รุป
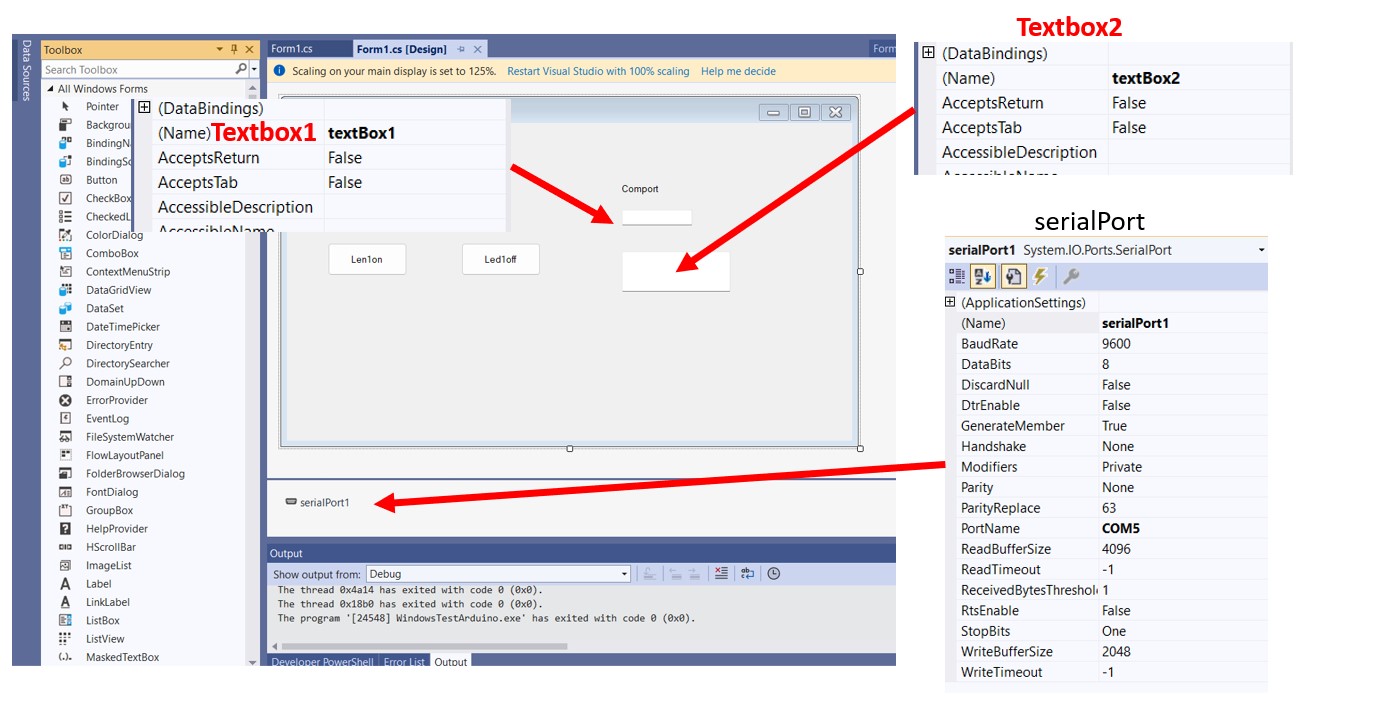
กำหนดค่าตาม รุป

กำหนดค่าตาม รุป
CODE C#
using System;
using System.Collections.Generic;
using System.ComponentModel;
using System.Data;
using System.Drawing;
using System.Linq;
using System.Text;
using System.Threading.Tasks;
using System.Windows.Forms;
using System.IO.Ports;

namespace WindowsFormsApp1
{
    public partial class Form1 : Form
    {

        public Form1()
        {
            InitializeComponent();
            try
            {
                string[] portname = SerialPort.GetPortNames();foreach (string n in portname)
                {
                    textBox1.Text = Convert.ToString(n);
                    serialPort1.PortName = textBox1.Text;
                    serialPort1.Open();
                }
            }
            catch
            {
            }
        }

        private void button3_Click(object sender, EventArgs e)
        {
            serialPort1.Write("1");
            textBox2.Text = serialPort1.ReadLine();
        }

        private void button2_Click(object sender, EventArgs e)
        {
            serialPort1.Write("0");
            textBox2.Text = serialPort1.ReadLine();
        }

        private void button1_Click(object sender, EventArgs e)
        {
            try
            {

                serialPort1.Write("3");
                textBox2.Text = serialPort1.ReadLine();
                serialPort1.Write("3");
            }
            catch
            {

            }
        }
    }
}
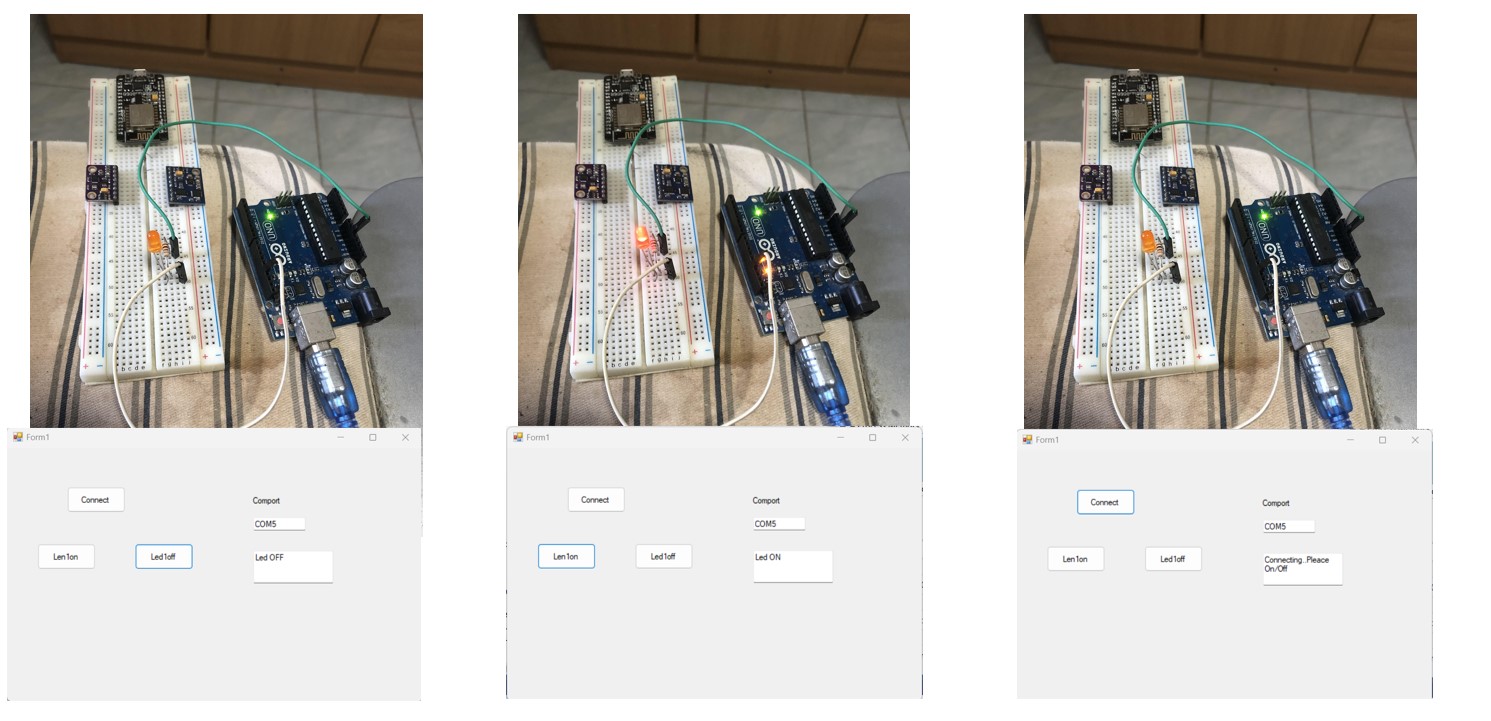
*แสดงรูปผลลัพธ์